If you want to move efficiently and feel more relaxed on the trail, a well-organized Ultralight Backpacking Checklist is one of the most reliable ways to cut weight without cutting comfort. This long-form guide translates big principles into field-ready steps you can weigh, pack, and practice on your very next trip, whether you’re dialing a weekend loop or building toward a long-distance hike.
Ultralight Backpacking Checklist: Quick-start Version
Here is a concise, screenshot-friendly list to establish your baseline. Use it as a starting point, then adapt by season, terrain, and your comfort preferences.
- Pack: 35–45 L frameless or light-framed (16–32 oz), wide straps, big side pockets
- Shelter: trekking-pole tent or shaped tarp (16–32 oz); 8 stakes; extra guyline
- Sleep: quilt or bag matched to expected lows; pad with season-appropriate R-value; dry sleep socks
- Kitchen: 550–900 ml pot, small stove and lighter or cold-soak jar; long spoon; mini windscreen
- Water: 1–2 L soft bottles; squeeze filter; a few backup tabs; optional 2 L collapsible bag for dry legs
- Clothing (worn): sun hoodie or breathable tee; shorts; trail runners; brimmed hat
- Clothing (carried): light puffy; wind shirt; reliable rain shell; spare socks; thin gloves and beanie in shoulder seasons
- Navigation and comms: phone with offline maps; paper map + small compass; whistle; compact power bank
- Hygiene and care: tooth kit; hand sanitizer; sun care; lip balm; small blister and hot-spot kit
- Repair kit: needle and thread; tenacious tape; mini cord; zip ties; pad patch; spare buckle
- Small essentials: headlamp; lighter; small knife; wallet; permits; small trash bag
That’s the skeleton. The rest of this article explains how to select each item, set realistic weight targets, and pack so your kit stays tidy and useful all day long. You’ll also find seasonal swaps, sample loadouts, and maintenance habits that help light gear last.
Setting Realistic Weight Targets and Decision Principles
Ultralight is less a number than a method. Even so, numbers make choices easier. Many hikers feel a dramatic comfort gain once base weight (everything except food, water, and fuel) drops below 10–12 lb for warm to hot conditions and 12–15 lb for shoulder seasons. Winter and high-altitude trips sit outside this range and require their own planning, but for three-season walking, these benchmarks are a helpful “good enough” target.
Use a short set of principles to steer decisions toward lighter, simpler, and more reliable.
- Function first: Pick the lightest item that actually works where you’re going. A 4 oz wind shirt can save a pound of fleece when gusts bite on ridgelines. A minimal rain shell helps if forecasts show showers; a burlier shell earns its place when days of cold rain are likely.
- One item, many jobs: Multipurpose gear keeps bulk low. A foam sit pad adds structure to frameless packs, protects inflatable pads, and serves as a lunch seat. A bandana becomes a prefilter, pot grabber, head wrap, or sun shade.
- Replace, then remove: Early on, swap heavy items for lighter equivalents that still perform. Once your kit is lighter and proven for your trips, you can remove extras you didn’t use. Avoid skipping essential safety or sleep items in the name of grams.
- Pack to a plan: Decide route, expected weather, mileage, and camps ahead of time, then pack for that plan. Packing for unknowns often adds bulk; packing for a known plan brings clarity.
- Weigh everything: Use a digital kitchen scale and log items in a simple spreadsheet. Reality beats belief; a “small” stuff sack can weigh more than a headlamp.
Weight ranges that feel realistic for many people using off-the-shelf gear:
- Big Three (pack + shelter + sleep system): 4.5–7 lb summer; 6–9 lb shoulder season
- Carried clothing: 2–3.5 lb depending on temperature swings and wind exposure
- Kitchen + water hardware: 8–18 oz excluding fluids
- Small essentials + repair + care: 12–20 oz total
Keep the numbers honest by noting what you actually used at camp and during the day. After trips, review what never left the bag and adjust. Iteration turns a checklist into your checklist.
Choosing a Pack: Capacity, Support, Fit, and Pockets
Your pack is the backbone of the whole system. The sweet spot capacity for most ultralight kits is 35–45 L. If you often carry a bear canister, shoulder-season clothing, or longer food stretches, aim for the upper end. If your trips are mostly weekenders with frequent water sources, the lower end may be fine. More capacity tends to invite extras; too little capacity forces frustrating compromises. Find the middle where your kit slides in without wrestling and the roll-top closes with a few turns.
Frameless vs. light-framed: Frameless packs save weight and shine when total start-of-day loads sit around 18–25 lb. If your first day routinely pushes 25–30 lb (big food carry, long dry stretch), a minimal frame, removable stay, or load-transfer pad can add comfort with little penalty. Many hikers use a folded foam pad inside as a virtual frame; it supports the pack body, protects the back, and doubles as a lunch seat.
Shoulder straps and hip interface: Look for wide, well-padded shoulder straps with breathable fabric. A removable hip belt that stabilizes without bulk is ideal for rolling terrain. Load lifters are helpful on light-framed designs. If a shop is available, try walking a few aisles with weight to check pressure points. Online? Follow sizing charts closely and measure torso length carefully.
Pockets and access: Big exterior pockets reduce pack-up/pack-down friction. Two deep side pockets should hold 1 L soft bottles securely. A large stretchy rear pocket swallows wet shelters and rain layers. Hip belt or shoulder strap pockets hold snacks, sunscreen, and a mini notebook. Skip heavy “brain” lids in favor of simple roll-tops and a few after-market strap-on pouches if you need them.
Durability and care: Fabrics like Ultra, Dyneema composite, and robust Robic blends balance strength and weight. After dusty trips, brush and rinse zippers and buckles. Patch pinholes early with repair tape; tiny fixes now prevent big repairs later.
Shelter Systems: Tents, Tarps, Bivies, and Storm Strategy
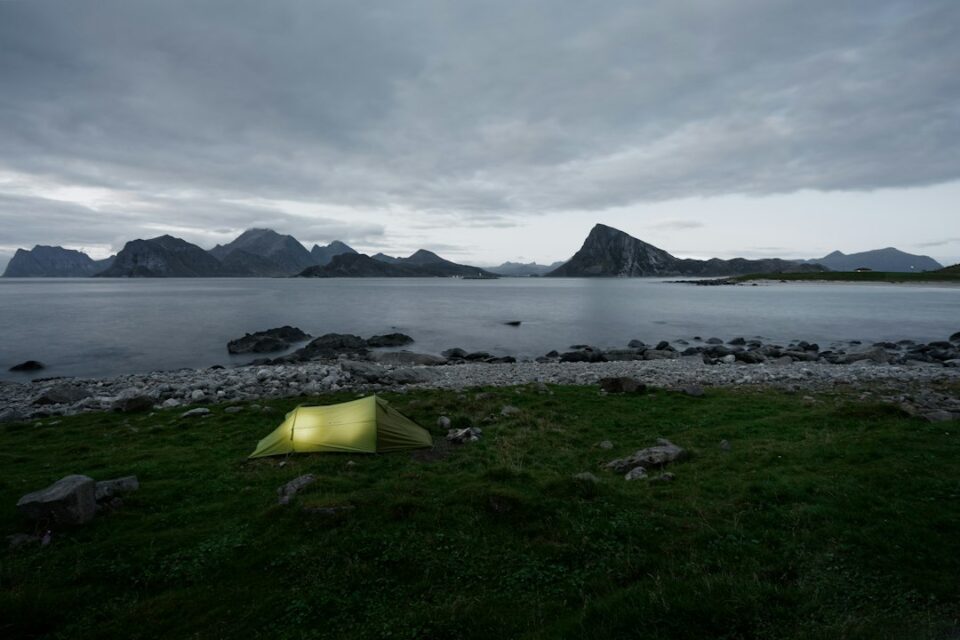
The “right” shelter is the lightest option that holds up to your forecast and pitch sites. For many three-season trips, a single-wall trekking-pole tent between 16 and 32 oz delivers a great balance of weight, space, and stormworthiness. Shaped tarps with a water-resistant bivy can be even lighter for bug-light seasons. Freestanding shelters add convenience on rock and sand but often weigh a bit more.
Match to weather: If storms or sustained rain are likely, choose a shelter with full-coverage panels, a bathtub floor, and strong guy points. Practice low, taut pitches at home until you can set it fast in wind. In shoulder seasons, consider a few extra guyline segments and sturdier stakes to help hold form on saturated ground.
Match to bugs: In bug-heavy months, inner nets or full mesh bodies are priceless. If you love tarp simplicity, a separate bug bivy offers flexibility. A light head net can cover short evening windows when gnats are thick.
Match to pitch sites: Tiny forest camps and alpine benches often demand small footprints. A non-freestanding shelter is fine if your stake skills are solid; freestanding designs help on rock or sand where anchors are creative. Carry eight stakes (six primary, two spares) and learn to anchor guylines with rocks, snow stakes, or buried sticks when soil fails.
Setup routines: Store a wet fly in your rear pocket to dry as you walk. Coil guylines uniformly and keep stakes in a dedicated pouch. Replace frayed lines and bent stakes before the next trip. In wind, stake windward points first; in rain, orient doors away from prevailing gusts.
Sleep Systems: Warmth-to-Weight, Pads, and Comfort Upgrades
Rest is the daily reset that makes long days pleasant. Quilts offer excellent warmth-to-weight ratios and pack small, but a well-fitted bag is great too. Choose ratings based on expected lows and your own sleep tendencies. Many hikers find a 30°F quilt/bag works for summer mountain trips while a 20°F option handles shoulder seasons. Add a light beanie and use your insulated jacket’s hood for extra head warmth with quilts.
Pad selection by R-value: The pad is half the system. R-values around 2–3 are fine for warm dirt camps; 3–4 helps on cool shoulder-season nights and alpine ground. On very cold earth, stack a small foam panel under your torso to boost insulation and protect an inflatable from sharp duff. Be mindful that air pads with horizontal baffles can feel tippy for some; vertical baffles or honeycomb designs may feel more stable.
Draft control and fit: With quilts, practice closing footboxes and securing pad straps at home. Pad straps reduce side drafts in breezy shelters. With bags, check zipper baffles and hood closures so you can adjust blind by headlamp. A 1–2 oz inflatable pillow or clothing-stuffed sack improves neck comfort, and dedicated dry sleep socks keep feet happy.
Moisture management: Air out quilts and bags during breakfast. Avoid breathing into the bag hood in cold temps to reduce internal condensation. Use a compression sack only for travel; at home, store lofted in a large cotton or mesh sack. Spot clean with mild soap and water; full washes are occasional, gentle affairs that extend life if done per manufacturer guidance.
Clothing Strategy: Layering Schemes for Seasons and Terrain
An ultralight wardrobe is a system designed around active movement, wind, sun, and evening chill. Aim to walk in a single light layer most of the day, adding or removing pieces briefly at breaks to stay comfortable without sweating into heavy clothing.
Base layers (worn): A sun hoodie or breathable tee plus shorts or light pants cover most warm trips. In shoulder seasons, a long-sleeve base helps. Pick quick-drying fabrics that resist odors and don’t chafe. Light colors reflect sun on exposed ridges.
Active insulation: A 3–4 oz wind shirt is a tiny, high-utility piece that blocks breeze during morning climbs and boosts warmth when paired with your base layer. It often delays the need for a heavier midlayer, saving weight and drying time.
Static insulation: A light synthetic or down puffy lives at the top of your pack. Put it on during breaks so you don’t “shiver away” calories, and wear it around camp. Synthetic fills handle damp better; down packs smaller and can be warmer per ounce. Many hikers keep a light fleece or grid hoodie in bug season for camp comfort.
Rainwear: Choose a reliable shell that vents well. On humid routes, pit zips or core vents help. Make sure cuffs seal and hoods adjust securely. In warm climates with short showers, some hikers substitute a wind shell and accept occasional dampness; on cold, sustained rain routes, a robust shell is a wise carry.
Hands, head, and extras: Thin gloves and a beanie increase comfort in shoulder seasons. A brimmed cap or sun hat manages day-long exposure. Dedicate a dry sleep layer—shirt and socks—to boost nighttime comfort and protect your sleep system from body oils.
Footwear, Foot Care, and Daily Trail Routines
Trail runners dominate ultralight kits because they dry fast, cushion well, and encourage a natural stride. Choose shoes with ample toe room for swelling and downhill braking. If your arches need support, swap in insoles you already know your feet like. Pair shoes with wool or synthetic socks that fit snugly and don’t bunch; bring at least one spare pair.
Foot care kit: A tiny kit goes far: a few pre-cut strips of toe-friendly tape, small sterile pads, a safety pin, disinfecting wipes, and a thimble-sized tube of friction-reducing balm. Add a short nail clipper if your nails tend to irritate adjacent toes during long descents.
Hot spot routine: The moment you feel a hot spot, stop. Air the foot, smooth the sock, and apply your preferred friction management product or tape. Early action prevents a small irritation from becoming a day-wrecking issue. At camp, rinse feet in a small pot of water away from streams, dry thoroughly, and put on dry socks for evening warmth.
Gaiters and debris control: Low stretch gaiters limit pebbles and grit that drive friction. Shake shoes at breaks on dusty trails. Replace laces before they fail; add a spare lace to your repair kit if you run older shoes close to end-of-life.
Water Strategy: Sources, Capacity, Filters, and Cold Night Management
Plan water carries around known sources and expected temperatures. In most three-season terrain with reliable streams, 1–2 L capacity works between stops. Long, dry stretches or ridge traverses often justify a 2 L collapsible bag for camp water or sustained climbs. Soft bottles save weight and compress when empty.
Filters and backup: Squeeze filters are fast and familiar. Back them up with a few compact tabs in your repair kit. In freezing nights, keep the filter in a pocket or inside your sleep system so residual water doesn’t freeze and damage internal fibers. If sources are silty, prefilter through a bandana or coffee filter to extend flow life.
Source research: Before trips, check seasonal notes on springs and streams. Talk with rangers, read recent trip reports, and peek at satellite imagery for likely seeps in arid zones. Mark slow pools on your map so you can prefilter. When camps are dry, “camel up” at the last source and leave with full bottles to minimize dry-time discomfort.
Hardware care: Clean bottles and bags between trips. Replace caps that leak and gaskets that crack. Backflush filters regularly on silty routes and refresh them according to the manufacturer’s schedule so flow stays strong.
Food Systems: Calorie Planning, Cooking, and No-Cook Options
Food weight is all about density and appetite. Many hikers carry 2,500–3,500 kcal per day at an average density of 100–125 kcal per ounce. Density-friendly staples include tortillas, nut butters, olive oil packets, ramen, couscous, instant potatoes, granola, nuts, and dehydrated meals. Test at home so your stomach is happy on trail; a food you love at your desk can feel heavy or bland at mile 15 if it doesn’t rehydrate well or if spices fatigue you.
Cooking kits: For hot meals, a 550–900 ml pot and a small stove cover most solo trips. A mini windscreen improves efficiency. A reflective pot cozy lets you simmer off flame, saving fuel. Lighter spoons with long handles reach the bottom of freezer-bag meals and tall pots. If multiple hikers share a kit, confirm pot size and fuel estimates before leaving.
No-cook strategies: In summer, cold-soak jars and no-cook menus save weight and time. Couscous, ramen, instant potatoes, and some dehydrated meals rehydrate well in 15–25 minutes with a snug lid and occasional shake. A small cloth keeps grit out when you set the jar on the ground. If your appetite relies on hot dinners, a micro stove remains a worthy luxury.
Snack placement and rhythm: Keep daytime snacks in hip-belt or shoulder pockets so you can graze without stopping. Regular bites every 60–90 minutes help energy stay steady and reduce the urge to sprint-eat at lunch. Consider an “hour-one” snack—something you always eat in your first hour of walking—to avoid falling behind on fuel.
Bear-aware storage: Where regulations require canisters, make space in your pack or use an external carry pattern that keeps the can balanced. Practice simple hangs where allowed. Label bags so you don’t confuse spice mixes with sports drink packets in low light.
Navigation, Risk Awareness, and Trip Planning Essentials
Phone-based navigation with downloaded tiles is accurate and weight-efficient. Pair it with a paper map and a small baseplate compass for redundancy. Practice simple bearings, handrails, and catch features so you can continue if batteries dip. A whistle on your sternum strap is a small, high-signal tool you hope never to need.
Power planning: For multi-day trips, a 5,000–10,000 mAh power bank covers phones and a headlamp top-up. Keep cords short and organized. Airplane mode and screen discipline stretch battery life more than you might think; so does lowering screen brightness and using the app’s power-saving options.
Risk awareness: Light gear works best when matched with thoughtful choices. Watch the horizon for storm build-up, note afternoon thunderstorms in mountain zones, and stay flexible. Adjust pace for snow slopes, talus, and slick roots. Turn around earlier than pride prefers if conditions trend away from your plan. The goal is a string of good trips and consistent joy, not a single finish at any cost.
Permits and logistics: Research permits, quotas, and camping regulations early, especially for popular corridors. Keep permits and ID in a small zip bag. Check shuttle options or trailhead parking rules so logistics don’t add last-minute stress. For regional inspiration and more walking ideas, explore the Traveling and Hiking section of our site for seasonal tips and route planning context.
Packing Method: Organization, Access, and On-Trail Flow
Packing well makes a light kit feel lighter. Think columns and zones so heavy items sit near your spine and frequently used pieces remain accessible without unpacking.
- Bottom: sleeping bag or quilt in a waterproof liner; next, the sleeping pad if inflatable. Keep this section dedicated to bedtime gear so it stays dry.
- Core column: food bag and stove kit. Put the most compact, heavier items against the center back panel at mid-back height to avoid a top-heavy feel.
- Perimeter: clothing bag and shelter. Fit the fly against the outer wall for fast access in rain; keep stakes and guyline in a small pouch you can grab blind.
- Top: puffy, rain shell, and first snack bag. This top zone is about rapid layer changes in wind and showers.
- Exterior: water bottles in side pockets; filter, spoon, and sun care in the rear mesh pocket; odds and ends in hip belt or shoulder pockets.
- On-body: phone with maps, small compass, whistle on sternum strap, mini knife, lighter, and an “immediate kit” (bandage strip, tape piece, lip balm).
Weatherproofing: Line your pack with a compactor bag or dedicated liner. Even with a “waterproof” pack fabric, a liner adds reliable redundancy. Roll the liner tightly and close the roll-top firmly, then compress side straps so the load rides close.
Daily routines: Before bed, stage breakfast and first snacks near the top. In the morning, you can pack on autopilot. Adopt a predictable place for each item so you don’t hunt for basics when energy dips. A tidy pack saves minutes that add up over long days.
Care, Repairs, and Post-Trip Maintenance for Longevity
Light gear lasts when you give it simple, regular care. It takes minutes after each trip and saves money over seasons.
Fabric care: Shake grit out of tents and packs. Gently rinse zippers, buckles, and mesh pockets to clear dust that grinds hardware. Patch tiny snags on shelters, wind shirts, and packs with repair tape before they grow. Store quilts and bags uncompressed in breathable sacks so loft remains healthy.
Filter and stove upkeep: Backflush filters after silty trips. Replace o-rings on stove caps that seep. Weigh partially used fuel canisters and note grams remaining in your log so you can confidently use them on the next short trip.
Knife, cord, and line: Touch up your tiny knife’s edge occasionally; replace tired guyline before the next storm cycle. Re-glue peeling seam tape or consult the maker if you suspect a warranty issue. For inflatable pads, test in a bathtub after each season to catch slow leaks.
Post-trip checklist: Dry everything fully; inspect stitching and cordage; charge the power bank; restock snacks and care items; and log what worked, what didn’t, and what you wish you’d carried. When your kit remains ready, saying yes to a last-minute overnight becomes easy.
Example 3-Day Summer Loadout and Seasonal Swaps
Use this example as a calibration tool, not a rule. Swap pieces to match your terrain, forecast, and comfort. The base weight here is roughly 9–11 lb for typical summer mountains.
- Pack: 40 L frameless with wide straps (about 20 oz)
- Shelter: trekking-pole tent (24 oz), 8 stakes, spare guyline
- Sleep: 30°F quilt (22 oz), inflatable pad R 3.2 (13 oz), sleep socks, beanie
- Kitchen: 700 ml pot + 2 oz stove + mini lighter + windscreen; long-handled spoon; small fuel canister
- Water: 2 × 1 L soft bottles; 2 L collapsible bag; squeeze filter + 3 backup tabs
- Worn clothing: sun hoodie, running shorts, trail runners, thin socks, brimmed cap
- Carried clothing: wind shirt, light puffy, rain shell, spare socks, thin gloves
- Nav/comms: phone with offline maps, paper map, compass, 10,000 mAh power bank, short cable, whistle
- Hygiene/care: tooth kit, small sanitizer, sun care, lip balm, blister-care supplies, mini tape roll
- Repair/smalls: needle and thread, tenacious tape, pad patch kit, zip ties, tiny knife, headlamp, wallet, permit, small trash bag
Food (typical): about 2.0 lb/day at ~120 kcal/oz. Breakfast: oats with milk powder and nuts. Day snacks: bars, tortillas with peanut butter and honey, jerky, trail mix. Dinner: ramen + instant potatoes + olive oil, or a dehydrated entrée. Electrolyte drink mix in one bottle for hot climbs.
Packing notes: Quilt and clothes at bottom in a liner; food centered near the spine; shelter body along one side and fly in rear pocket; rain shell at top for quick access. First snacks in hip belt. Filter and spoon in rear mesh for fast grabs.
Seasonal swaps:
- Dry summer deserts: more water capacity (carry 3–4 L), sun-first clothing (loose sun hoodie and airy pants), robust wind protection. Consider a shade tarp for long mid-day breaks.
- Shoulder seasons: warmer quilt/bag (20°F), thicker pad (R 4+), beefier rain shell, fleece gloves, wool hat, and a shelter that pitches low and tight against wind-driven rain.
- Bug peaks: inner nets or full mesh tents; head net; a light long-sleeve base and pants for dusk and dawn comfort.
- High alpine: traction devices if icy mornings are likely, heavier wind layers, and a more storm-worthy pitch. Add a small emergency bivy if you often push late above treeline.
Adjust food density and appetite expectations as days get colder; many hikers eat more in shoulder seasons because their bodies burn extra calories to stay warm.
Budget Tips, DIY Options, and Smart Upgrades
Ultralight can be affordable with a plan. Spend where comfort and reliability pay back every day: the sleep system, footwear, and pack fit. Save by buying used, borrowing gear to test ideas, and making simple items at home.
Smart spend areas: A well-fitting pack removes shoulder bite and back rub. A dialed quilt/bag and pad set transforms nights into steady recovery. Trail runners that truly fit reduce friction and terrain clumsiness. Upgrading these three pays dividends on every mile.
Places to save: DIY alcohol stoves and pot cozies work and cost little. A quality foam pad is durable and multi-use. A simple tarp plus bug bivy can cost less than a premium double-wall tent while weighing less. Weigh your current gear before shopping; many hikers find pounds to lose by replacing a heavy rain shell, oversized pot, or duplicated clothing.
Buy used, test early: Responsible secondhand markets make ultralight accessible. Inspect stitching, zippers, and coatings; test at home; and verify return options. Track purchases and impacts in your gear spreadsheet to see what truly helped.
Upgrade path: Replace the heaviest item that delivers the least comfort first. That might be a bulky pack, an overbuilt shelter, or a heavy fleece that a wind shirt could replace most days. Sequential, measured upgrades prevent expensive dead-ends.
With the right plan, your kit lightens at reasonable cost while your experience improves week by week.
Skills and Routines That Make Ultralight Feel Natural
Skill replaces ounces. A smooth shelter pitch, smart layering rhythm, and tidy packing routine do more for comfort than most single gear swaps.
Practice shelter pitching: Pitch in the yard, at a park, and on windy ridges. Learn at least two pitch heights and know how to tighten guylines from inside when rain begins. Practice door orientation so you naturally face away from prevailing winds by habit.
Layer discipline: Put on the wind shirt before the ridge, not on it. Don the puffy at breaks even if you feel warm; staying warm keeps energy steady. Stash a small snack where you can reach it without removing the pack so refueling stays automatic.
Walking rhythm and breaks: Every 60–90 minutes, take a 5–10 minute pause in shade. Sip water, nibble, adjust socks, and stretch calves. Small, regular pauses protect long-day energy and reduce late-mile stumbles.
End-of-day flow: Pitch first, lay out the sleep pad and quilt, and only then handle cooking, journaling, or chores. This painless order keeps sleeping gear dry and ready while light remains. A five-minute tent tidy before sleep prevents frantic morning searches.
Trip notes and iteration: After each outing, write what you used daily, what never left the bag, what felt heavy for its benefit, and what you wished you’d had. The note takes five minutes, and the gains compound across seasons.
When your system is dialed, miles feel easier and views feel closer. Use the ideas in this guide to build a kit that suits your routes, climate, and style. Pack light, hike kind, and refine a little after every trip.