A full body stretching routine works best when it fits the life you already have. You do not need a studio, advanced flexibility, or an hour of spare time. You need a repeatable sequence, sensible intensity, and a way to adjust the plan when your energy, schedule, or activity changes. This guide lays out a practical system for building that habit, choosing movements, using dynamic and static work, tracking progress, and keeping sessions comfortable over time.
What a useful routine should accomplish
Stretching is easier to maintain when it has a clear job. A short session might prepare you for a walk, loosen the feeling that builds after a desk day, or create a quiet transition between exercise and sleep. These are different goals, so they do not need identical sessions.
For general movement, aim to visit the major regions of the body during the week. That includes the neck, upper back, shoulders, chest, hips, glutes, thighs, calves, ankles, feet, wrists, and hands. You do not need to give every area equal time in every session. A balanced weekly pattern matters more than a perfect daily checklist.
Use three questions to decide what belongs in a session. What am I doing before or after this routine? Which areas feel restricted during ordinary movement? What position lets me breathe calmly and keep control? The answers give you a better starting point than copying the most difficult routine you find online.
- Before a workout, favor easy movement through a comfortable range.
- After exercise or in the evening, use slower holds if they feel pleasant.
- After sitting, include standing movement before floor-based positions.
- When balance is uncertain, use a wall, chair, cushion, or yoga block.
A routine should leave you feeling more prepared to move, not drained from trying to reach an impressive shape. Mild tension can be part of a stretch. Sharp pain, tingling, numbness, joint pinching, or a sudden loss of strength calls for stopping and seeking advice from a qualified health professional.
Build your full body stretching routine
A simple session has four parts. The first is an arrival phase, the second is active preparation, the third is the main sequence, and the fourth is a brief reset. This structure keeps you from dropping onto the deepest position while your body is still cold and distracted.
- Arrive for one minute. Stand or sit comfortably. Notice your breathing, feet, shoulders, and jaw. Decide whether today calls for a light, regular, or supported session.
- Move for two to five minutes. March, walk, circle the shoulders, rotate the upper back, and gently bend the knees.
- Stretch for six to fifteen minutes. Select one or two movements for each region that deserves attention. Use controlled repetitions or relaxed holds.
- Reset for one to three minutes. Breathe slowly, walk around, or lie on your back with the knees bent.
For a six-minute version, choose four movements and spend about forty-five seconds on each, with brief transitions. For a twelve-minute version, choose six movements and hold each side for thirty to forty-five seconds. For a twenty-minute version, add a second round or spend more time on two areas that affect your daily movement.
Write your sequence on a note card rather than relying on memory. A useful card might say, “march, upper-back rotation, chest opener, hip flexor, figure four, hamstring hinge, calf rock, breathing.” The wording does not need to be technical. It needs to be clear enough that you can begin without making another decision.
Warm up with movement, not force
A warm-up raises attention and gives joints a chance to move before longer positions. It can be quiet and low impact. You might walk around your room, climb a few stairs at an easy pace, or march beside your desk while swinging the arms naturally.
Standing preparation
- March in place. Lift one foot at a time and let the arms swing. Continue for forty-five to sixty seconds.
- Heel-to-toe rocks. Shift from heels to the balls of the feet without gripping the toes. Use ten to fifteen slow repetitions.
- Shoulder circles. Begin with small circles and gradually make them larger. Keep the ribs quiet and avoid shrugging.
- Standing rotations. Place the feet under the hips and rotate the shoulders gently from side to side. Let the arms follow rather than pulling them around.
- Hip circles. Hold a counter or wall if needed. Draw small circles with the pelvis, then change direction.
Floor preparation
- Cat-cow movement. On hands and knees, round and lengthen the spine with a slow breath. Keep the motion comfortable.
- Rocking child’s pose. From hands and knees, shift the hips toward the heels and return. Use a cushion under the knees if the floor feels hard.
- Quadruped reach. Slide one hand forward while the opposite knee stays grounded, then switch sides. Keep the hips steady.
Dynamic movement is useful before running, lifting, classes, or sport because it keeps you alert. It should look smooth rather than aggressive. Leg swings, lunges, and arm reaches become less useful when they turn into fast kicks or forced end ranges.
Upper body sequence for the neck, shoulders, and back
Many people feel upper-body stiffness after reading, driving, cooking, or working at a screen. The answer is rarely to pull the head hard to one side. Small, controlled motions often make it easier to notice where the tension sits.
Neck and upper back
- Chin nod. Sit or stand tall. Make a small nod as though looking toward a book held below eye level, then return. Do six to eight repetitions. Keep the back of the neck long.
- Side neck lean. Let the right ear move toward the right shoulder while the left shoulder stays heavy. Hold for twenty to thirty seconds, then change sides. Do not pull on the head.
- Upper-back reach. Interlace the hands in front of the chest, reach forward, and allow the shoulder blades to spread. Hold for twenty to forty seconds while breathing slowly.
- Thread the needle. From hands and knees, slide the right arm under the left and rest the shoulder lightly on the floor. Stay for three to five breaths, then switch.
Chest and shoulders
- Doorway chest opener. Place one forearm on a doorframe with the elbow below shoulder height. Step through slightly until the chest feels open. Keep the shoulder away from the ear.
- Wall slide. Stand with your back near a wall. Bend the elbows and slowly slide the arms upward only as far as the ribs and shoulders remain relaxed. Perform six to ten repetitions.
- Cross-body shoulder reach. Bring one arm across the chest and support it near the upper arm with the other hand. Keep the shoulder blade settled. Hold twenty to thirty seconds per side.
- Overhead side reach. Reach the right arm up and lean gently to the left. Keep both feet grounded and avoid twisting the ribs forward. Repeat on the other side.
Compare the left and right sides without trying to make them identical. A difference may reflect your work setup, sport, preferred sleeping position, or recent activity. Use the easier side as a reference for intensity, then give the tighter side time without forcing it to match.
Hip and spine work for sitting days
Hips often feel restricted after long periods in a chair, but the sensation may also come from the back, glutes, or the way the feet meet the floor. A useful sequence moves through several positions rather than blaming one muscle for every stiff feeling.
Hip flexor and front-of-hip options
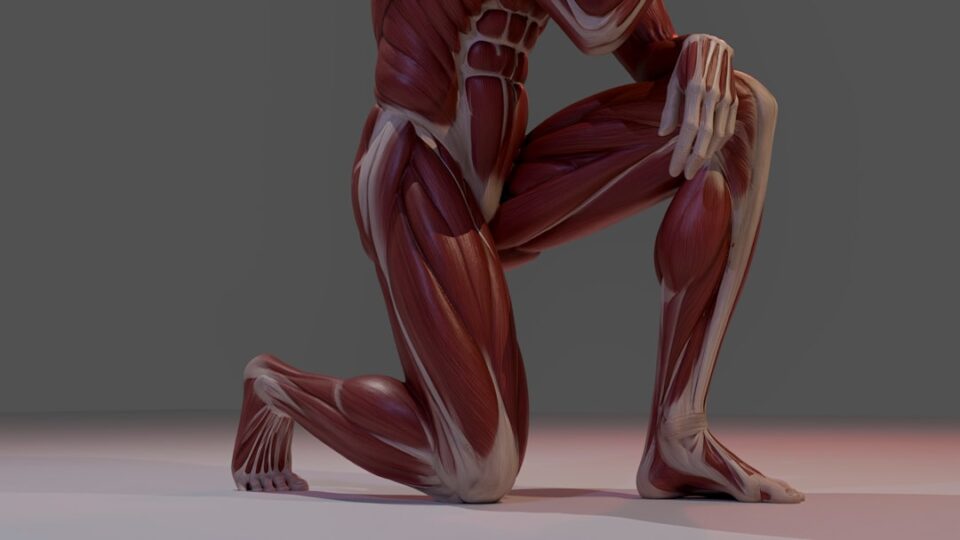
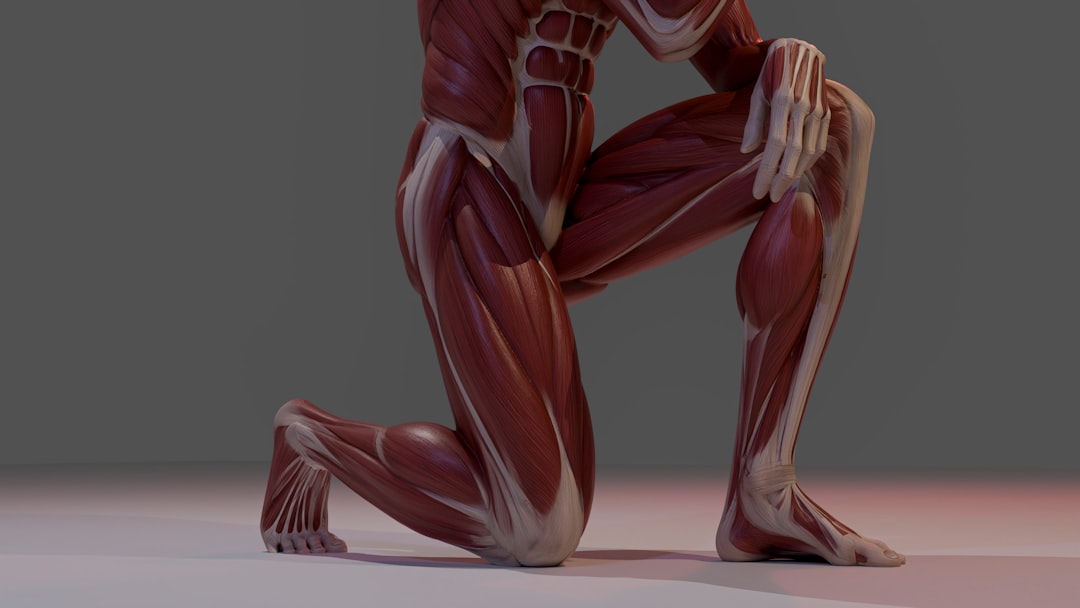
- Supported half-kneeling hold. Place one knee on a folded towel and the other foot in front. Hold a chair if balance is uncertain. Gently draw the tailbone downward and shift the pelvis forward a small amount. Keep the ribs stacked over the pelvis.
- Half-kneeling rock. From the same position, move the hips forward and back through a small range. Use six to ten repetitions per side. This variation is useful before a walk or workout.
- Standing split stance. Step one foot behind you, soften both knees, and gently tuck the pelvis. Reach the arm on the back-leg side upward if that feels natural. Hold for three to five breaths.
Glute and outer-hip options
- Figure four on the back. Lie down with both knees bent. Place the right ankle over the left thigh and draw the legs toward you until the right hip feels a mild stretch. Switch sides.
- Seated figure four. Sit near the front of a chair, place one ankle over the opposite knee, and hinge forward with a long spine. Keep the movement modest if the knee feels pressured.
- Supported 90/90 position. Sit with both knees bent and use cushions beneath the hips or knees as needed. Lean slightly toward the front shin, return upright, and rotate gently toward the back leg.
Add spinal movement between hip positions. A slow standing twist or hands-and-knees rotation can make the sequence feel less like a series of isolated holds. Keep the pelvis steady enough that the movement comes mainly from the upper back, and stop before the motion becomes jerky.
Leg, ankle, and foot sequence
Leg work does not require touching the toes. The goal is to explore a comfortable relationship between the hips, knees, ankles, and feet. A soft knee and a long spine usually make hamstring positions more manageable than pulling the chest toward the floor.
Back of the legs
- Standing hamstring hinge. Place one heel on a low step or keep both feet on the floor. Soften the knee, send the hips back, and lean forward from the hip crease. Keep the back long. Hold twenty to forty seconds per side.
- Strap-assisted hamstring position. Lie on your back and loop a towel around one foot. Slowly extend the leg upward while keeping the opposite knee bent. Use the towel for guidance, not leverage.
- Wide-knee forward fold. Stand with the feet comfortable and knees softly bent. Hinge forward only as far as the breath stays calm. Let the arms hang rather than pulling down.
Front of the thighs
- Supported standing quad hold. Hold a wall or chair. Bend one knee and guide the heel toward the seat while keeping the knees close enough to feel stable. If the front of the knee feels crowded, lower the heel and move the thigh slightly behind you.
- Side-lying quad hold. Lie on one side with the bottom knee bent for balance. Reach back for the upper foot and guide it toward the hip. Keep the waist relaxed.
- Prone quad option. Lie on the stomach and bend one knee at a time. Place a cushion under the hips if the lower back feels compressed.
Calves, ankles, and feet
- Wall calf lean. Step one foot back, keep the heel heavy, and bend the front knee toward the wall. Hold twenty to forty seconds, then repeat with the back knee slightly bent to change the emphasis.
- Half-kneeling ankle rock. Place one foot forward and guide the knee toward the toes while the heel stays down. Move in and out for eight to twelve repetitions.
- Ankle circles. Sit or hold a support. Draw eight slow circles in each direction per ankle. Keep the movement at the ankle rather than swinging the whole leg.
- Toe spread. Sit comfortably, spread the toes apart, relax them, and repeat eight to ten times. Finish by rolling the foot gently from heel to ball.
Runners, hikers, and court-sport players may prefer ankle rocks before activity and longer calf holds afterward. People who spend the day in dress shoes or rigid work boots may appreciate foot movement during short breaks. These small choices make the routine feel connected to real life.
Technique, breathing, and intensity
Intensity is easier to judge when you use a simple scale. Imagine a range from zero to ten, where zero means no sensation and ten means overwhelming strain. Most general stretching belongs around three or four. You should notice the target area, but you should still be able to speak, breathe, and adjust your position.
Use a gradual entry. Move into the position until you find the first clear sensation, pause, and take two easy breaths. If the sensation softens, you may explore a little more. If you brace, grimace, hold your breath, or feel the sensation move into a joint, back out.
- Keep the face, hands, and jaw relaxed.
- Use a slow exhale that lasts a little longer than the inhale.
- Choose support before balance becomes a distraction.
- Keep joints aligned enough that the target area, rather than the joint itself, carries the sensation.
- Use steady holds instead of bouncing into the end range.
Static holds of twenty to sixty seconds can fit after exercise or into an evening routine. Dynamic movements of six to twelve controlled repetitions work well before activity. Neither style needs to be used exclusively. A half-kneeling rock can prepare the hip, followed by a short supported hold when the body feels ready.
Contract-relax methods deserve extra care. If you use one, settle into a mild position, gently press against an immovable surface at low effort for about five seconds, release, and return to a comfortable hold. Skip this method if it makes you strain or if you are unsure about the setup. Simple breathing and positioning are enough for most people.
Three schedules for different weeks
A routine survives when it has a small version, a regular version, and a flexible version. That way, a busy day does not turn into a lost week.
The six-minute minimum
- March or walk for one minute.
- Perform standing rotations and shoulder circles for one minute.
- Use a supported half-kneeling hip position for one minute, changing sides halfway.
- Hinge for the hamstrings for one minute, changing sides halfway.
- Use calf rocks and ankle circles for one minute.
- Lie down or stand quietly for one minute of relaxed breathing.
The twelve-minute general session
- Warm up with marching, arm circles, and cat-cow for three minutes.
- Use thread the needle and a doorway chest opener for two minutes.
- Use a figure four and half-kneeling hip hold for three minutes.
- Use a hamstring hinge and calf wall lean for three minutes.
- Finish with one minute of easy breathing.
The twenty-minute evening session
- Walk slowly or move through standing preparation for four minutes.
- Spend three minutes on the neck, upper back, and chest.
- Spend five minutes on the hips and glutes with cushions or blocks available.
- Spend five minutes on hamstrings, quads, calves, and ankles.
- Finish with three minutes lying on your back, breathing without forcing a pattern.
A sample week might include the twelve-minute session on Monday, a short desk-break sequence on Tuesday, the twenty-minute session on Wednesday, a workout-specific session on Thursday, the twelve-minute session on Friday, an optional walk and calf routine on Saturday, and the six-minute minimum on Sunday. Rest days can remain rest days. The schedule is a menu, not a test.
Adjust the plan for work, training, and age
Desk and driving days
Use movement breaks before stiffness becomes the main event. Every sixty to ninety minutes, stand for two or three minutes. Walk to refill water, perform five shoulder circles, rotate the upper back, and take a few hip-extension steps. At the end of the workday, choose the twelve-minute session rather than trying to compensate with an intense hour.
Running days
Before a run, use brisk walking, ankle rocks, leg swings, marching, and easy split-stance movements. Keep the range smaller during the first few minutes. After the run, choose calves, quads, hip flexors, and glutes if those areas feel worked. A short walk before sitting can make the transition easier.
Strength-training days
Match preparation to the lifts ahead. A lower-body session may call for ankle rocks, hip circles, bodyweight squats, and controlled lunges. An upper-body session may call for wall slides, upper-back rotations, and light arm circles. After training, select positions that feel calming rather than trying to force extra range while tired.
Sport and active hobbies
Use a progressive warm-up before tennis, football, basketball, dance, climbing, or martial arts. Start with walking and joint circles, move into controlled lunges and rotations, then add the activity at lower speed before full effort. Afterward, use a few comfortable holds and note which areas felt most loaded.
Returning to movement
Use a chair, wall, cushions, and shorter holds. Start with five or six minutes on alternate days. Walking and gentle cycling can sit beside the routine without making the session complicated. If a movement repeatedly causes pain or unusual symptoms, pause that movement and consult a qualified professional for individual guidance.
Track progress without chasing extreme flexibility
Flexibility is only one possible change. You may notice smoother transitions, less hesitation when reaching, easier stair climbing, or a calmer response to a long day. Track those experiences because they tell you whether the routine fits your needs.
Choose two simple checks and repeat them once per week under similar conditions. Do not force the comparison.
- Overhead reach. Stand near a wall and lift the arms. Notice whether the ribs flare, the shoulders shrug, or the arms move more smoothly.
- Hip hinge. With soft knees, hinge forward and notice the distance reached, the evenness between sides, and the quality of the movement.
- Ankle glide. In a half-kneeling position, guide the knee toward the toes while keeping the heel down. Mark the distance with your fingers rather than forcing a maximum.
- Chair rise. Stand from a chair five times at an easy pace. Notice control, breathing, and how the feet meet the floor.
- Daily comfort note. Write one sentence such as “turning to check the blind spot felt easier” or “my shoulders felt less busy after lunch.”
Change the plan when the notes stay flat for several weeks. You might need more warm-up, fewer positions, better support, or a different time of day. Progress can also mean learning to recognize a poor day and choosing a gentler session instead of forcing the planned one.
Common mistakes and practical fixes
- Starting with the deepest position. Walk or move for two minutes first. The first position should feel like an invitation, not a challenge.
- Using the same sequence for every activity. Put dynamic work before sport and slower holds after it. Desk recovery may need more upper-back and hip movement.
- Pulling for a bigger shape. Reduce the range until you can breathe and keep the joints comfortable. Add time gradually.
- Holding the breath. Count a quiet inhale and a longer exhale. If the rhythm disappears, make the position easier.
- Ignoring one side. Perform the same number of repetitions on both sides, then give a little extra time to the side that needs it if the sensation remains comfortable.
- Letting equipment become a barrier. A towel can replace a strap, a book can replace a block, and a wall can provide balance.
- Trying to make up missed sessions. Return with the six-minute minimum. A normal session is more useful than a punishing one.
- Changing too many variables. Keep the same basic sequence for two weeks before deciding whether it suits you. Change one movement or one time slot at a time.
Make the habit survive real life
Consistency is a design problem. Put the routine where the decision is already made. Keep a towel beside the mat, leave the chair facing an open patch of floor, or save the sequence beside the calendar reminder for your workout. The goal is to remove small points of friction.
Use an anchor that happens often. You might stretch after brushing your teeth, after shutting down the laptop, while waiting for a shower to warm, or immediately after a walk. If the anchor disappears, use a backup cue such as the first cup of coffee or the moment you change clothes.
Keep a visible record for four weeks. Mark the date, duration, and one observation. A record that says “eight minutes, hips felt easier after sitting” gives you more useful information than a simple perfect-or-failed score.
Every four to six weeks, review the plan. Remove movements you dislike, shorten transitions, and keep the positions that make daily movement feel better. You can rotate themes across the week, such as upper body on Monday, hips on Wednesday, legs on Friday, and a balanced session on the weekend.
Safety boundaries and when to seek individual guidance
General stretching guidance cannot account for every injury, operation, health condition, medication, pregnancy, or training demand. If you have a recent injury, ongoing pain, unexplained swelling, numbness, tingling, dizziness, joint instability, or a noticeable loss of strength, individual advice from a qualified health professional is appropriate before adding new movements.
Stop a position when symptoms become sharp, electrical, numb, or unstable. Change the angle, add support, reduce the range, or choose a different movement. A comfortable stretch in a muscle is different from pressure inside a joint. You do not need to push through warning signals to make a session worthwhile.
Use a stable surface, keep walkways clear, and avoid practicing difficult balance positions when tired or distracted. If the floor is cold or hard, use a folded blanket. If getting down or up is difficult, keep the whole routine standing or seated. Accessibility is part of good programming, not a compromise.
A four-week maintenance plan
Week one is for learning. Use the six- or twelve-minute session four times. Focus on setup, breathing, and remembering the order. Keep holds around twenty seconds and use plenty of support.
Week two is for repetition. Keep the same movements and add one longer session if your schedule allows. Note which positions feel natural and which ones create confusion. Rewrite the sequence in simpler language where needed.
Week three is for gentle progression. Add five to ten seconds to selected holds, two controlled repetitions to dynamic movements, or one extra position for an area that matters to your activities. Change only one variable so you can tell what made the session feel different.
Week four is for review. Keep the routine that fits and remove anything that feels like an obligation without a clear purpose. Reduce the total time if your training load or work schedule is high. A lighter week can preserve the habit while giving your body and attention more room.
The long-term version may be surprisingly ordinary. Move for a few minutes, choose positions that match the day, breathe without strain, and record one useful observation. A routine built this way can remain part of your morning, workout, work break, or evening without taking over the rest of your life. For more movement guides and practical sports resources, visit Chikiri Sports and browse the Body Stretching category.