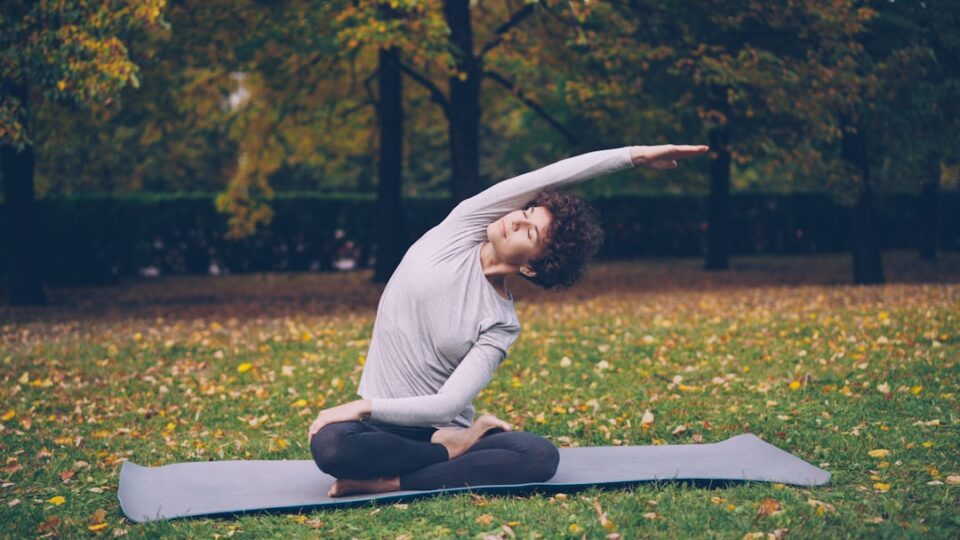
A full body stretching routine is a simple, flexible way to feel less stiff, check in with your body, and create a rhythm you can actually keep. The goal is not extreme flexibility or dramatic shapes. The goal is a small, reliable practice that helps you move with less resistance, notice tight areas before they dominate your day, and finish with a clearer sense of where your body feels open and where it feels guarded.
If you like having context and a library of variations, explore our body stretching hub on chikirisports.com. This guide stays practical. You will find a base sequence, an ultra-quick version for hectic days, sports-specific add‑ons, and strategies to keep the habit alive when motivation dips. You will also see how to adjust positions for different bodies, floors, and energy levels so the routine always feels available, not overwhelming.
full body stretching routine: what it is and why it helps
When people say they want to stretch more, they often mean they want to feel less cramped during ordinary life. They want to sit at a desk without a nagging shoulder, stand up from a chair without a tug through the back of the legs, and finish a workout without feeling like the next day will be a grind. A full body stretching routine answers that by giving you a simple loop through the major areas that shape how you move: neck, chest, upper back, spine, hips, hamstrings, calves, and feet.
The routine approach solves three problems at once. First, it removes the daily debate. Instead of asking yourself what to stretch, you follow the map. Second, it spreads attention across the whole body instead of chasing only the loudest area. That balance matters because a single tight zone often comes from how nearby regions are organizing themselves. Third, it builds memory. The more often you follow the same path, the less mental energy the session requires. That is the quiet key to consistency.
It helps in ordinary, boring ways that add up. Gentle neck rotations can soften the shrug many of us carry after screen time. A steady chest opener can make breathing feel less crowded. A few minutes for the hips can make walking and stairs feel smoother. Calf and foot work often gets ignored, but easing those areas can make standing, balance, and even the way your knees feel during the day more comfortable.
None of this asks for a heroic effort. It asks for attention, a modest dose of time, and repeatable order. The best routine is the one you actually complete on an average weekday, not the one that looks impressive once a month.
Foundational principles for safe, effective stretching
Before you jump into sequences, a few guidelines make the practice feel clearer and more reliable:
- Warm the tissue with gentle motion first. A few shoulder rolls, cat‑cow movements, ankle circles, and slow hip shifts signal to your nervous system that movement is safe. Moving first often makes holds feel better.
- Choose positions you can breathe in. If you cannot take slow breaths through your nose or you find yourself bracing, back off the angle or choose a different variation. Comfortably steady breathing is a sign you have selected a useful depth.
- Hold for 20–40 seconds by default. That window is long enough to settle and short enough to stay present. On rushed days, keep the lower end and complete the circuit. On open days, add an extra pass for the few areas that need more time.
- Stability first, angle second. A stable joint position with a smaller angle beats a dramatic angle that feels shaky. Use a wall, a block, a strap, or the floor to support stable alignment.
- Stop on sharp, electric, or unstable sensations. Change the position, reduce range, or skip that move for the day. General information like this guide cannot replace advice from a qualified professional who knows your history.
- Compare sides with curiosity, not judgment. If one side feels tighter, give it a little extra time, but resist the urge to wrestle it into symmetry. The body rarely presents as a perfect mirror.
With those principles in mind, the rest of this article gives you clear sequences and options you can mix and match without turning the routine into guesswork.
Gear and setup checklist
You do not need much to make this easy to repeat. A small kit removes friction, especially on low‑energy days:
- Mat or soft surface: A yoga mat or folded towel protects knees and lets you settle without sliding.
- Wall or doorframe: Perfect for chest openers, calf stretches, and supported hamstring positions.
- Strap, belt, or towel: Helpful for hamstring and calf work without pulling on the neck or rounding the back.
- Two blocks or sturdy books: Bring the floor closer for lunges and forward folds; great for beginners or tight hips.
- Chair or edge of a couch/bed: Useful for seated versions when getting down to the floor is not ideal.
- Timer or breath count: A simple phone timer or counting two to four slow breaths keeps the session even.
Set up a small, visible space. If your mat lives under the bed or in a closet, the routine becomes easier to ignore. Keeping the kit ready reduces negotiation time and increases how often you start.
A 15‑minute base sequence (top to bottom)
This is the repeatable map. Move slowly, breathe, and aim for 20–40 seconds per stop unless noted. One pass takes about 12–15 minutes.
- Neck and upper back wake‑up (60–90 seconds total): Gentle chin tucks (5 slow reps), head turns (left/right), and small nods. Add two or three shoulder rolls forward and back.
- Chest opener at the wall or door (20–40 seconds each side): Forearm vertical on the doorframe, elbow at shoulder height, step forward and turn slightly away until you feel a steady stretch across the chest and front of the shoulder. Keep the shoulder down and neck long.
- Thoracic twist (20–40 seconds each side): Sit tall or lie on your side with knees bent. Rotate gently, keeping your breath calm. If you feel pinching, reduce angle and lengthen through the crown of your head.
- Cat‑cow flow to neutral (30–45 seconds): On hands and knees, move slowly through flexion and extension, then settle in a neutral spine.
- Hip flexor lunge (20–40 seconds each side): From half‑kneeling, tuck the back toes, gently posteriorly tilt the pelvis (think “zip up” the front of your hips), and shift a little forward until you feel the front of the hip on the back leg. Keep ribs stacked over hips.
- Figure‑four or seated external rotation (20–40 seconds each side): On your back, cross one ankle over the opposite knee and draw the legs toward you; or sit tall, cross the ankle over the knee, hinge forward slightly. Keep the back long.
- Hamstring hinge (20–40 seconds each side): Options: a supported straight‑leg raise with a strap while lying on your back, or a standing or seated hinge with a soft knee. Focus on length through the back of the leg rather than rounding the spine.
- Calf wall lean (20–30 seconds each angle, each side): Back leg straight, heel down for gastrocnemius; then bend the back knee slightly to reach soleus. Keep the foot pointing forward and hips level.
- Ankles and feet (45–60 seconds total): Slow ankle circles each way, toe spreads, and a gentle toe flexion/extension sequence (within comfort). Finish by pressing the big toe into the floor and lifting the other toes, then reverse.
Finish with three slow breaths standing or seated. Notice whether any region still feels guarded. If time allows, return to that area for one more round. The second pass often feels smoother because the body recognizes the position and settles faster.
A 5‑minute micro version for busy days
Five minutes is long enough to make a difference when the alternative is skipping entirely. Use a timer and flow through the following:
- Minute 1: Shoulder rolls, chin tucks, and easy head turns.
- Minute 2: Doorway chest opener, 30 seconds each side.
- Minute 3: Half‑kneeling hip flexor lunge, 30 seconds each side.
- Minute 4: Hamstring hinge with a strap or at the wall, 30 seconds each side.
- Minute 5: Calf wall lean (straight knee then soft knee) and quick ankle circles.
This version keeps the top‑to‑bottom logic while removing extra transitions. Do it before a walk, after a work block, or as a short reset before bed. If energy is very low, convert to a chair version: seated chest opener, seated figure‑four, seated hamstring reach with a strap, and ankle circles.
Warm‑up motions vs. longer holds
You will feel the difference between slow, repeating motions and steady holds. They each serve a purpose, and blending them can make the session feel better:
- Warm‑up motions (5–10 reps): Shoulder rolls, cat‑cow, ankle circles, gentle spinal rotations. These help ease the nervous system into movement and create a sense of safety. On stiff mornings or after travel, start here.
- Longer holds (20–40 seconds): Lunge, figure‑four, hamstring hinge, calf lean. These give you time to settle into a position and notice the sensation without rushing. Use a breath count if the clock feels distracting.
When in doubt, organize each stop like this: a few warm‑up motions to “arrive,” then the hold. That rhythm turns the routine into a thoughtful practice rather than a checklist.
Adjustments for different bodies and contexts
Your routine should bend to fit your body and your day. Here are common scenarios and simple ways to adapt the positions:
- Knees feel sensitive on the floor: Double up the mat or use a folded towel under the kneeling knee. You can also perform hip work as a standing lunge with hands on a chair for balance.
- Limited hip rotation: Choose a lying figure‑four instead of the seated version, and keep the foot of the crossed leg flexed. Place a folded towel under the head so the neck can relax.
- Hamstrings feel “stuck” in forward folds: Soften the knee and hinge at the hips with your hands on blocks or a chair. Lying hamstring work with a strap often feels more supportive.
- Shoulders feel crowded in overhead positions: Skip overhead reaches. Use chest openers at the wall and cross‑body stretches instead, keeping the shoulder blade heavy and neck long.
- No floor space available: Build a wall‑and‑chair routine: doorway chest opener, standing lunge with back heel down, hamstring at the wall with the heel on a low ledge, and calf lean. Finish with ankle circles and toe spreads standing tall.
- Energy is low: Keep the 5‑minute version and do it gently. On very low‑energy evenings, a slower, shorter session can still feel restorative without revving you up.
- Older adults or returning movers: Emphasize stability, use more support, and keep all holds shorter at first. The goal is confidence and comfort, not intensity.
Adjusting like this is not cheating. It is smart practice. The best move is the one you can do comfortably today and repeat tomorrow.
Add‑ons for common sports and activities
Use the base loop as your backbone, then add one or two targeted moves depending on what you did that day. Keep these add‑ons short so you still finish the circuit.
- Runners and walkers: Extra calf work (straight and soft knee angles), gentle hip flexor lunge with a small pelvic tuck, and a brief standing quad stretch holding a chair for balance.
- Strength training days: Add a lat side bend (arm overhead, lean slightly away while keeping ribs stacked), a pec doorway hold, and a gentle glute focus with figure‑four. Hips that worked hard under load often appreciate slow external rotation work.
- Cyclists: Longer time in hip flexor lunge and thoracic rotation. Add gentle wrist and forearm care if your ride involved long periods on the bars.
- Swimmers: Gentle shoulder external/internal rotation at the wall, scapular slides, and an easy chest opener. Keep angles conservative and breathing smooth.
- Field and court sports: Brief adductor work (wide‑stance side lunge with support), calf angles, and ankles/feet attention for cutting and landing demands.
Keep total time about the same. Instead of adding 15 minutes, swap one base move for your add‑on on that day. That way the routine stays realistic.
Progress you can actually measure
Progress is not only about touching your toes. It is about how your body behaves during ordinary life. Here are ways to notice change without chasing extremes:
- Ease of daily movements: Standing from a chair, walking upstairs, reaching overhead to a shelf. Do these feel less hesitant after a week or two?
- Breathing during holds: Can you keep a smoother breath in the same positions? That often signals better comfort and stability.
- Recovery perception: After a workout or long workday, does your body feel less “glued” the next morning when you run the quick version?
- Consistency streaks: Track how many weeks you complete two to four sessions. A reliable routine is progress.
Simple self‑checks help: once a week, note which area felt loudest, which move felt most helpful, and which part you want to support a bit more next week. These notes keep the routine honest and focused on your needs.
Habit design: fitting it into real weeks
The third week is the hardest. The novelty is gone, the schedule is full, and the mat looks far away. Design for that week, not the first one.
- Attach the routine to an existing cue: After coffee, after you close the laptop, or after a walk. When it rides on something you already do, it feels less like an extra task.
- Keep the kit visible: If the mat and strap are in sight, they remind you the option is there. Out of sight often equals out of practice.
- Have two versions ready: The 15‑minute base and the 5‑minute micro. On days with low bandwidth, the short option protects the habit.
- Set a finish line: “After I shut my laptop, I do the six‑stop loop.” Clear start, clear end. Decision friction shrinks.
- Batch with other care: Pair the routine with a short walk, a glass of water, or two minutes of quiet breathing. Small bundles feel satisfying.
Think in seasons. Some weeks you will do more, some less. What matters is that the routine stays part of your identity: “I am someone who gives my body a few minutes of attention most days.” Identity tends to carry habits longer than motivation alone.
Troubleshooting: discomfort, plateaus, and red flags
A good routine should feel steady, present, and free of sharp signals. When something feels off, use this checklist:
- Discomfort vs. strain: A steady, tolerable stretch is fine. If the sensation turns sharp, electric, or unstable, ease out immediately and try a gentler angle or a different variation.
- Breath check: If your breath gets choppy, read that as feedback. Adjust the depth until you can breathe more smoothly.
- Joint alignment: Use support so joints feel stacked and relaxed. For example, in a lunge, keep the front knee tracking over the middle toes and the back glute slightly active to stabilize the pelvis.
- Range ego: If you feel rushed to go deeper, pause. Most benefit comes from calm consistency, not big range on a single day.
- Persistent or worsening pain: If an area keeps signaling strongly, or daily tasks become painful, pause the routine for that region and seek personalized guidance from a qualified professional.
Plateaus happen. If the routine feels stale, tweak one variable at a time: switch one move for a cousin variation, change the order occasionally, or use a different prop. Small changes can refresh attention without losing the structure.
Common mistakes and simple corrections
Years of coaching and personal practice reveal the same patterns over and over. Here are the frequent mistakes and what to try instead:
- Pushing too hard too soon → Scale back one notch. Aim for a “moderate but steady” sensation. You should be able to breathe and hold a short conversation if needed.
- Skipping one side → Use a mental bookmark. After the first side, tap the floor or the wall with your fingertips as a cue to switch.
- Bouncing without settling → Arrive, then hold. Use two or three pulses to find position, then settle for 20–40 seconds.
- Rushing the lower legs and feet → End with them. Calves and feet are the foundation. A few extra breaths there can change how standing and walking feel.
- Treating the routine like homework → Anchor it to mood benefits. Ask yourself how you want to feel in ten minutes: calmer, looser, more alert. Then choose the version that matches that aim.
- Forgetting support → Use props generously. Blocks, straps, walls, and chairs are not shortcuts. They are smart tools that improve alignment and comfort.
When in doubt, simplify the session to the base map, slow the breath, and complete the loop. Consistency outperforms intensity over months.
Reference sequences you can copy
Use these as plug‑and‑play plans depending on the time you have and how you feel.
- Desk‑reset (8–10 minutes): Neck rotations, doorway chest opener, seated twist, standing hip flexor lunge using a chair, hamstring hinge with hands on desk, calf wall lean, ankle circles.
- After‑run (10–12 minutes): Hip flexor lunge (two angles), hamstring strap sequence, calf wall lean (straight and soft knee), figure‑four, gentle thoracic rotation, toes/feet finish.
- Evening wind‑down (8–12 minutes): Cat‑cow, lying figure‑four, supported hamstring with strap, gentle spinal twist on the floor, soft calf stretch, slow ankle circles, and three quiet breaths.
- Travel day (6–8 minutes): Shoulder rolls, doorway chest opener, standing hip flexor lunge with chair support, calf lean, ankle circles, toe spreads.
All of these use the same logic: top to bottom, broad to specific, finish at the feet.
Frequently asked questions
How many days per week should I do this? Two to four sessions work well for most people. If your days are busy, even two short check‑ins can feel helpful across a week.
Morning or evening? The “better” time is the one you will keep. Mornings can feel stiff but are great for setting the tone. Evenings can feel calmer and pair well with a quieter pace. Try both and notice which one sticks.
Should I do this before or after workouts? Light, movement‑based versions work well before. Longer, steadier holds fit better after. You can also separate the session from training entirely and use it as a stand‑alone reset.
What if I feel sore the next day? Mild soreness can happen, especially when you first pay attention to under‑used areas. Scale the next session’s depth and time, then build gradually.
Do I need to add strength work? Many people feel best with a blend of mobility, simple strength, and regular walking. This guide focuses on stretching, and pairing it with light strength often complements the feeling of stability. If you are unsure how to combine them, consider asking a qualified coach or clinician for personalized guidance.
A final note on mindset
A good routine is not a performance. It is a conversation with your body. You do not need a perfect soundtrack, a perfect room, or the perfect mood. You need a small plan, a few props if helpful, and a willingness to give yourself ten minutes even when life is noisy.
Build your version of the base sequence, keep the 5‑minute option in your pocket, and adjust angles to suit your body today. If something feels sharp or unstable, ease out and choose a gentler path or ask a professional for advice. The routine will earn your trust the same way any habit does: by returning, again and again, until it feels like part of how you take care of yourself.